- in "Product Management" for a single product and
- via "Automation & Rules" for specific campaigns, ad groups, keywords, tags or a focus.
The way the automation works is the same in both cases.
Setup of an automation on a product basis
In "Product Management", an automation can easily be activated for an ASIN on a marketplace using the slider on the right side. When activated, the system creates an automation that is applied to all ad groups selected for that product in the "Structure" view. For this purpose, enter an individual target ACOS that you want the system to work towards. If the Selling Partner API is connected, you can also select one of the dynamic strategies.
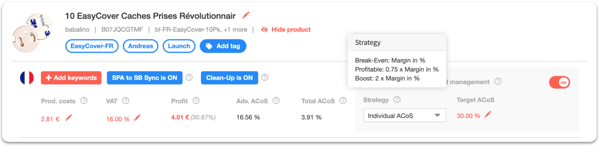
If you activate an automation in Product Management, then these automations are displayed in "Automation & Rules". This is the folder "Controlling automated SKU Rules". Since the folder is an automatically generated folder, no manually created automations or rules can be stored here. Therefore, please do not move manually created automations or individual rules to the "Controlling automated SKU Rules" folder. If you tried to put your automation or rules there, please contact our support team and we will delete it for you in the backend.
Note: You can place manually created automations or individual rules before and after them to determine their priority. The higher the automation or rule is in the list, the higher its priority is.
Good to know: You can also create your individual folder structure and move your folders as you like via Drag & Drop. Just click on "+ New Folder" (top left).
Setup of an automation for specific campaigns, ad groups, keywords, tags or a focus
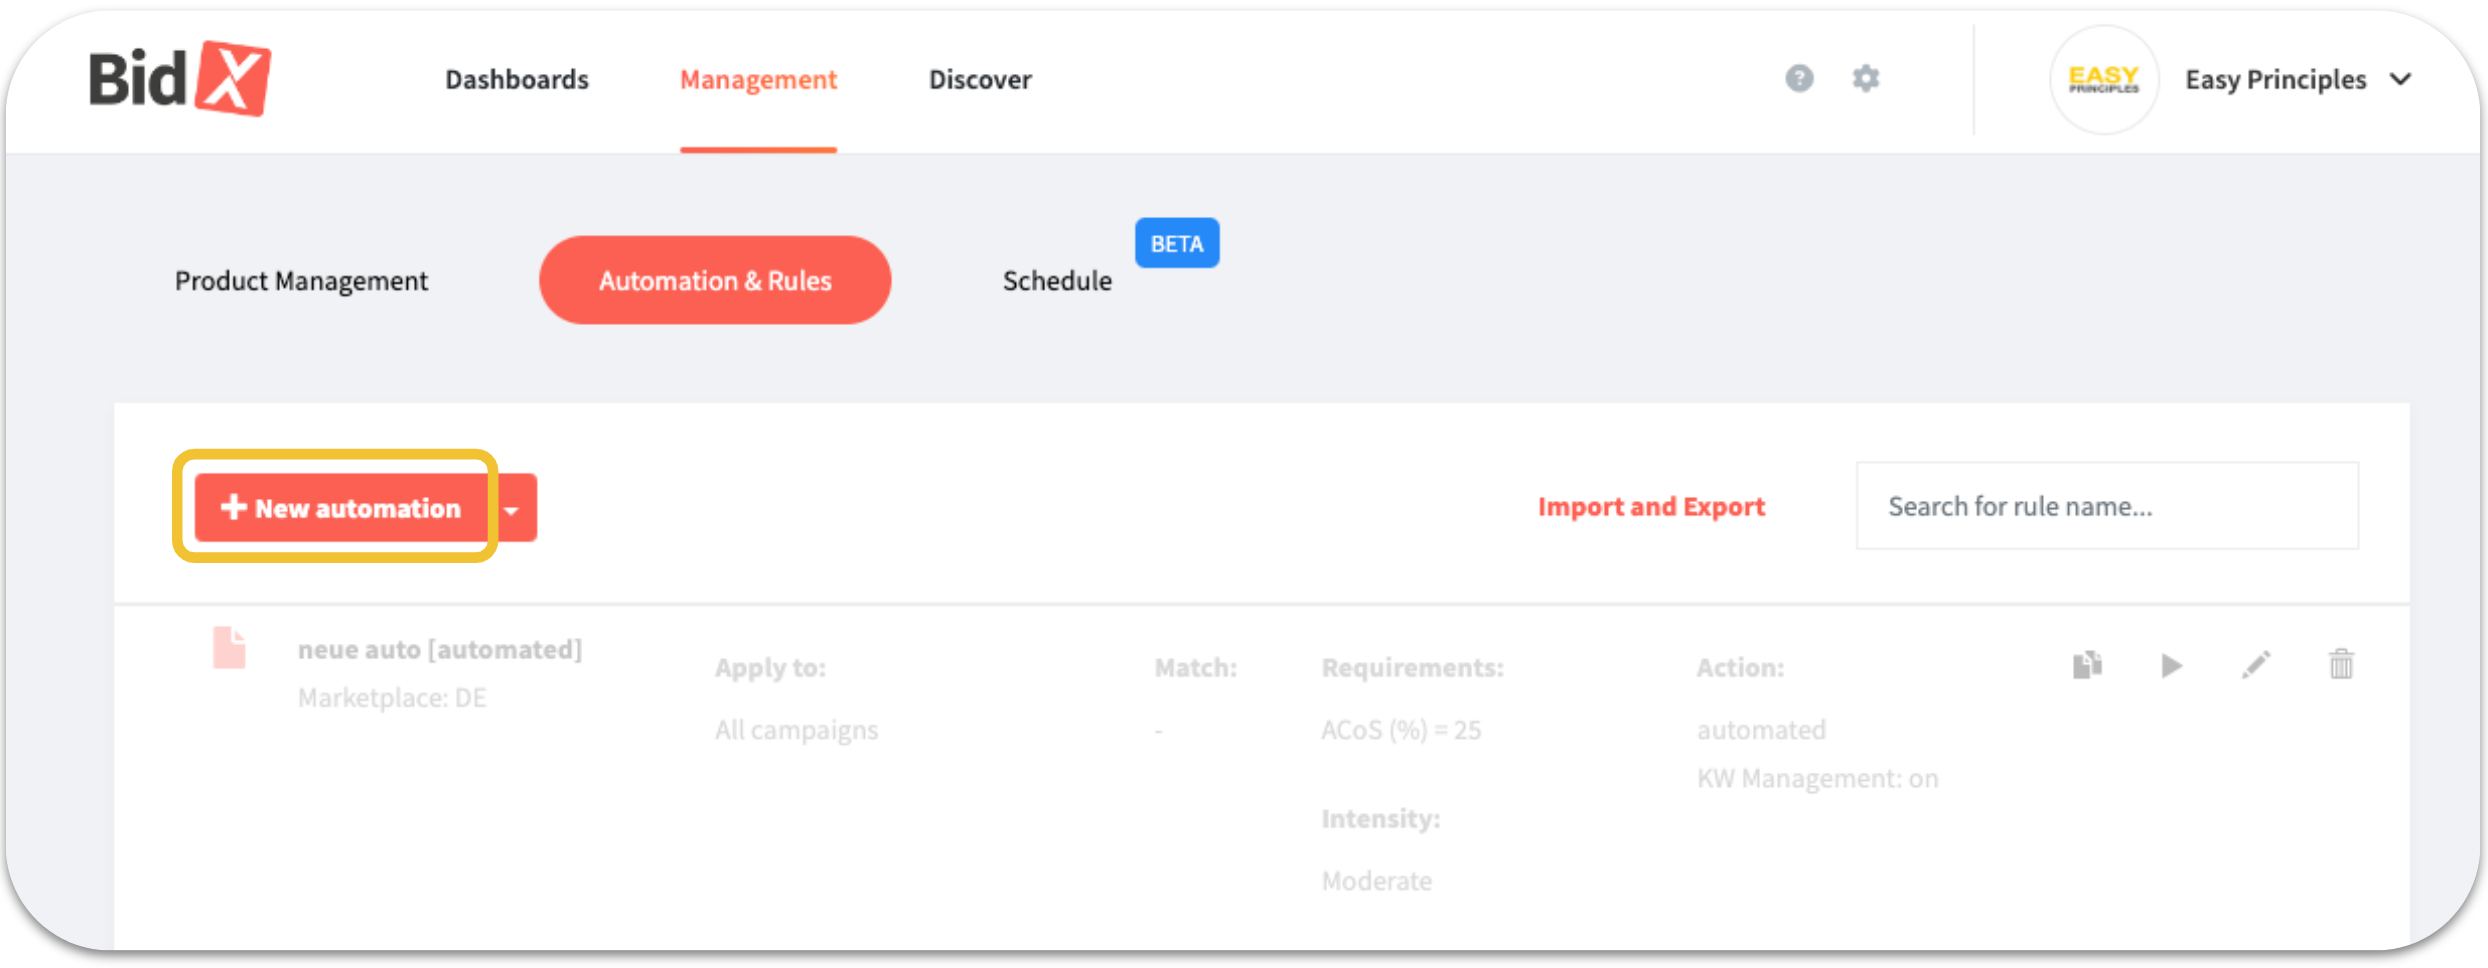
To create such an automation, click in "Automation & Rules" on "+ New Automation".
In the opening modal window you can specify all settings for the automation in three steps:
1. Initial settings
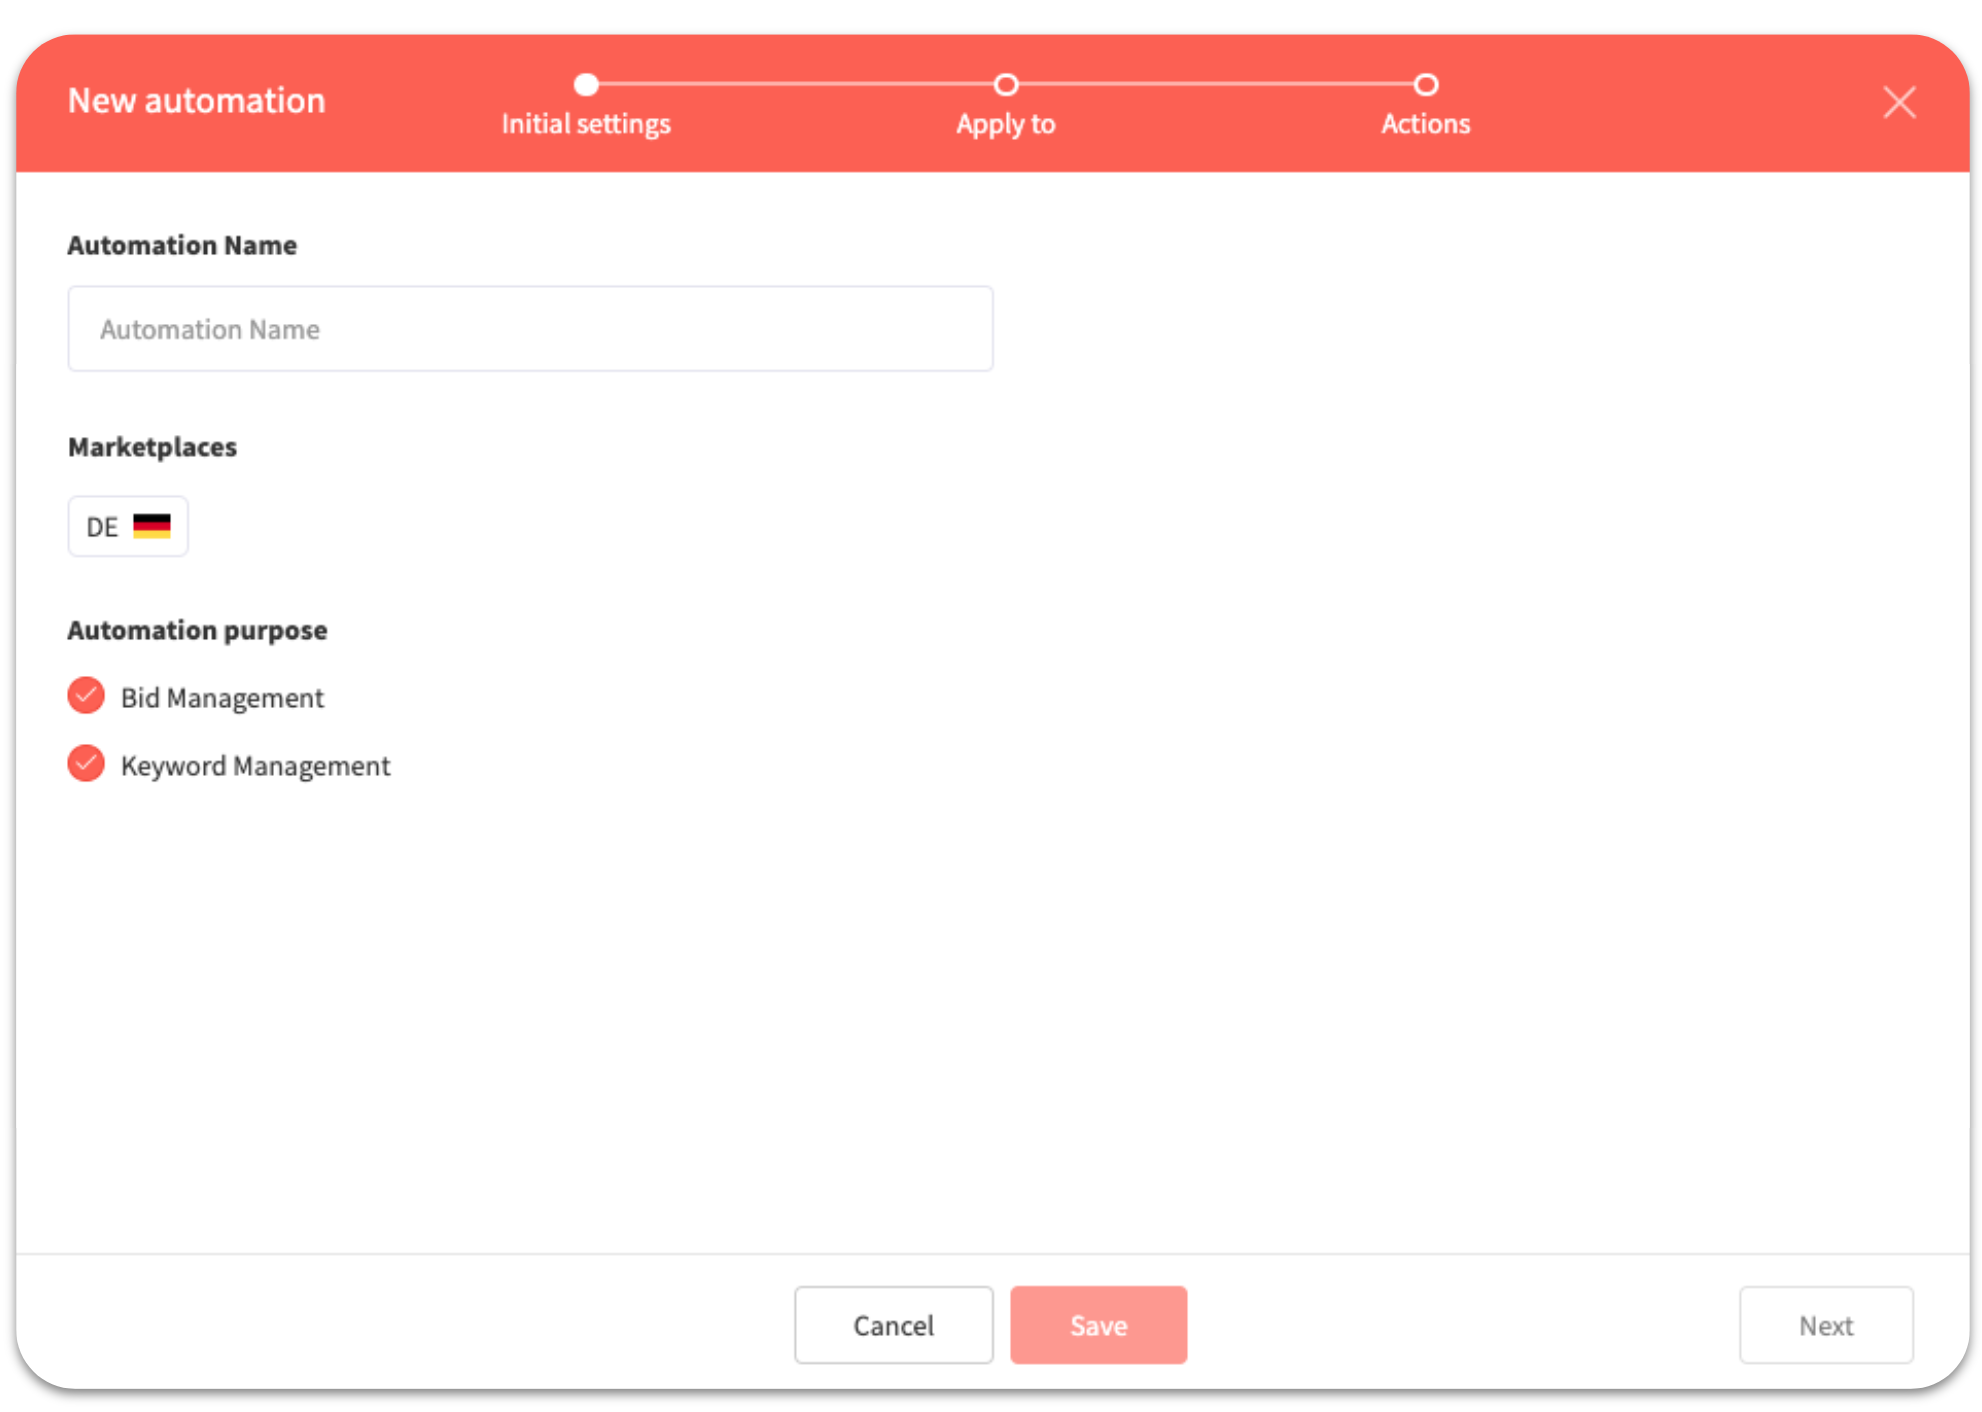
- Automation name: First, give your automation an identifying name, such as the target value or the campaigns to which it will be applied.
- Marketplaces: Select the marketplaces to which you want to apply the automation.
- Automation purpose: Select here whether the automation should perform bid management, keyword management, or both.
Note: At least one marketplace must be selected to proceed.
Confirm the basic settings by clicking "Next" (bottom right).
2. Apply to
Here you define what the automation should be applied to. For this you can choose between campaigns, ad groups, targets, tags or focus types and mostly also combine them (by clicking on "+"). You can also select whether only one of the conditions (Match ANY of the below) or all conditions must match (Match ALL of the below) for the automation to take effect.
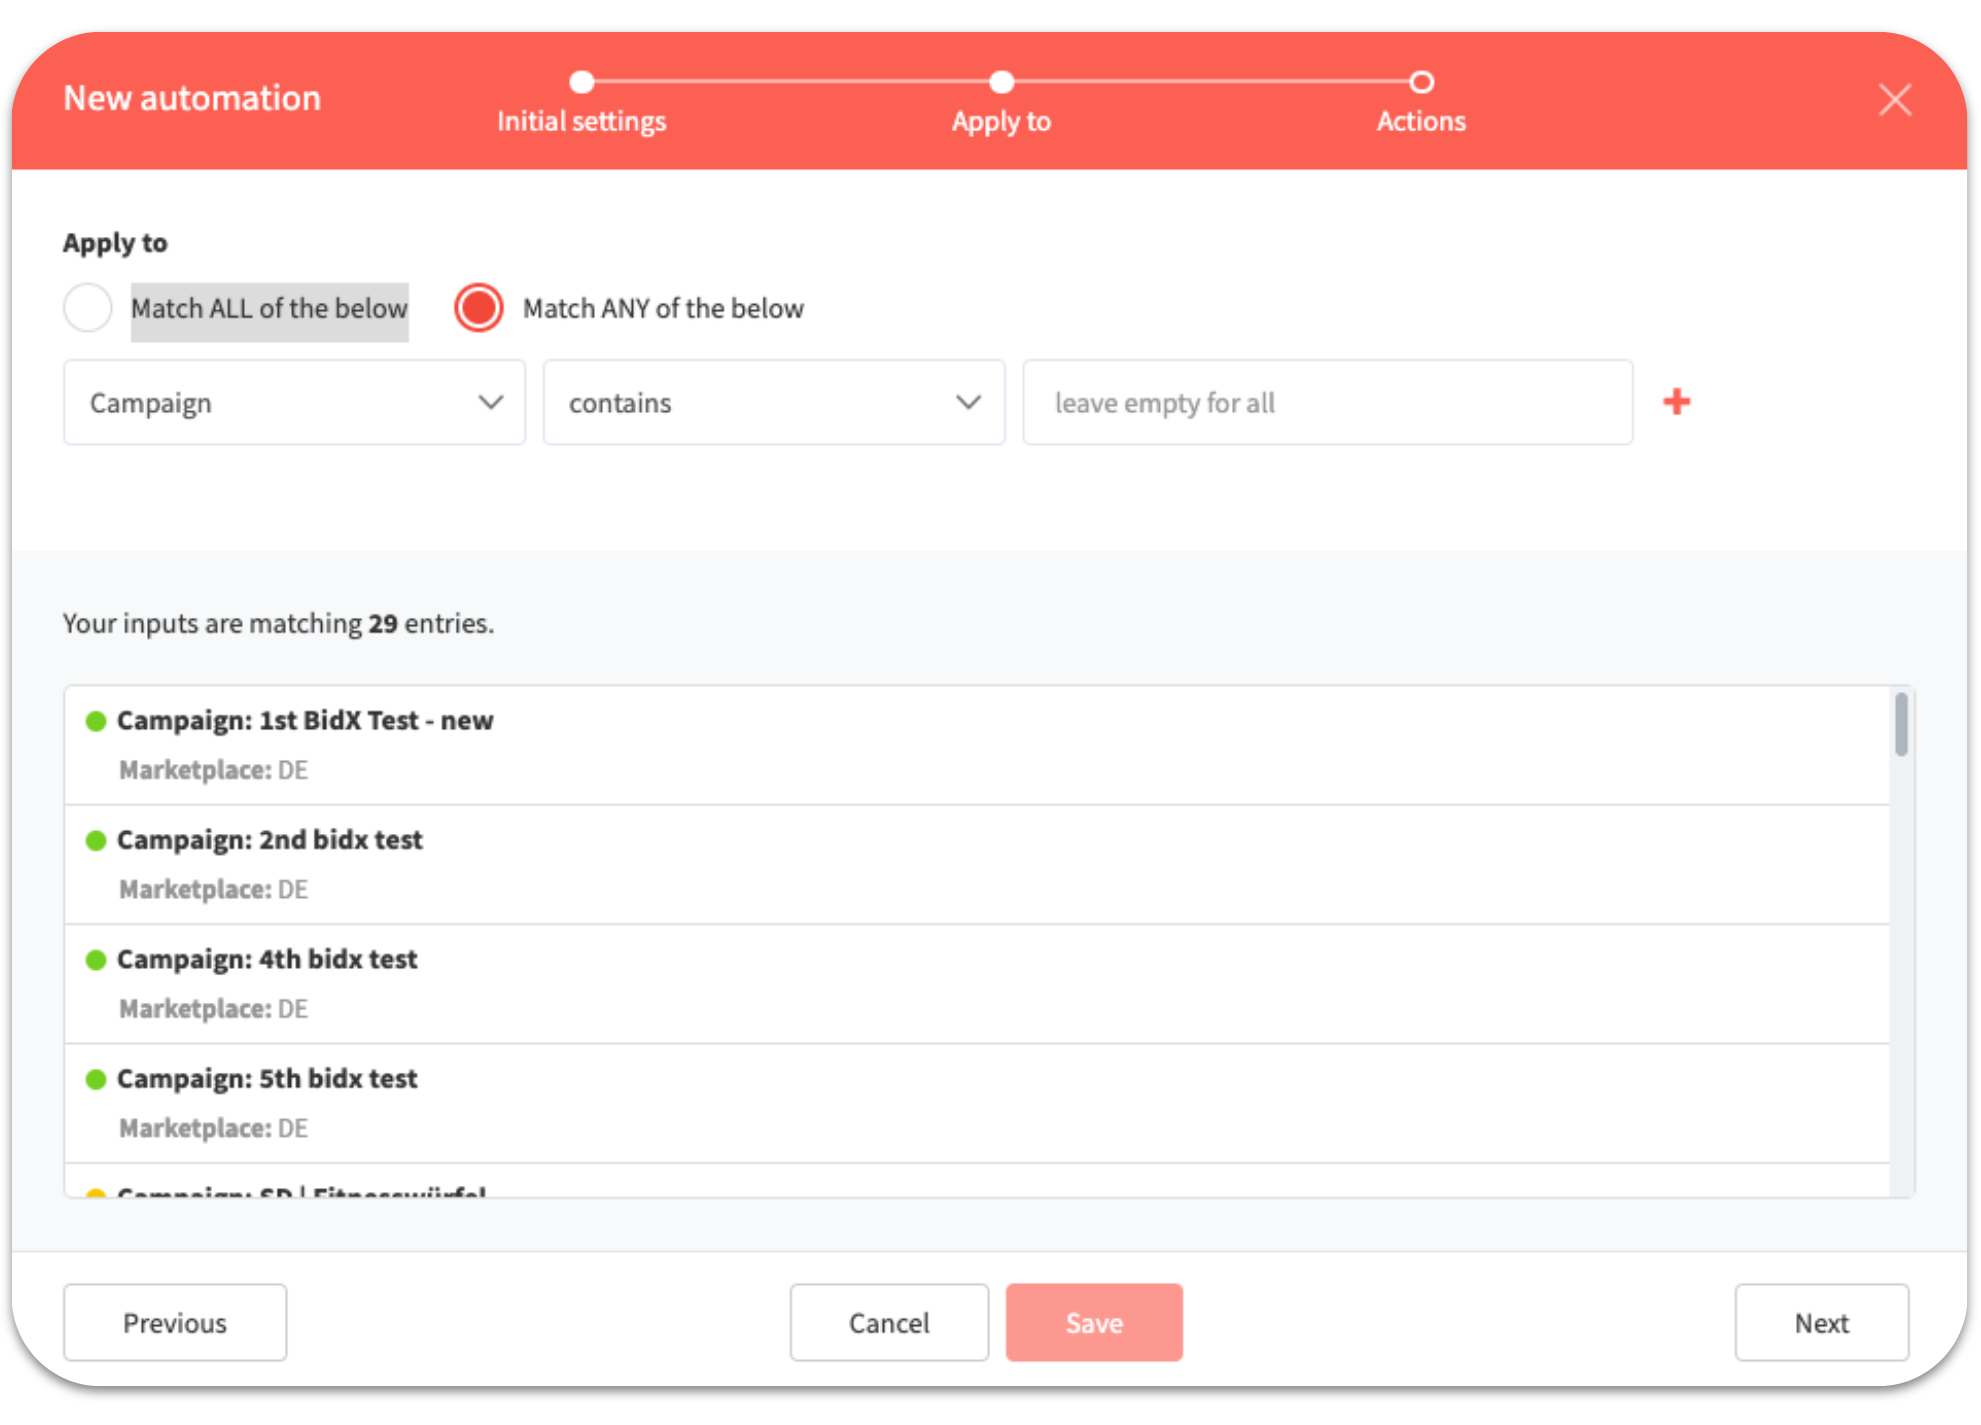
If the desired campaigns are displayed in the preview, click on "Next" again.
Note: If you want the automation to act on all campaigns of the selected marketplaces, this field must be left empty.
3. Actions
You are now in the "Actions" area. It is divided into two different zones: In the upper part you can define the target value and the intensity of the automation:
- Target: you select a target value for ACOS, Total ACOS or ROAS that the automation should work towards. The bids of the keywords affected by the automation are then adjusted so that the current ACOS, Total ACOS or ROAS gets closer and closer to the target value.
- Automation Intensity: your bid adjustments can be optimized as usual with the default "Moderate" setting. "Cautious" means that bid adjustments require more clicks than the statistically significant number of clicks. With the "Dynamic" setting, an adjustment is made after just a few clicks.
In the lower section "Keyword management settings" you now have the option to specify exactly how alignments should be shifted. You can also specify whether the alignment is shifted positively or negatively and whether a bid change takes place. Rows can be added or removed as desired.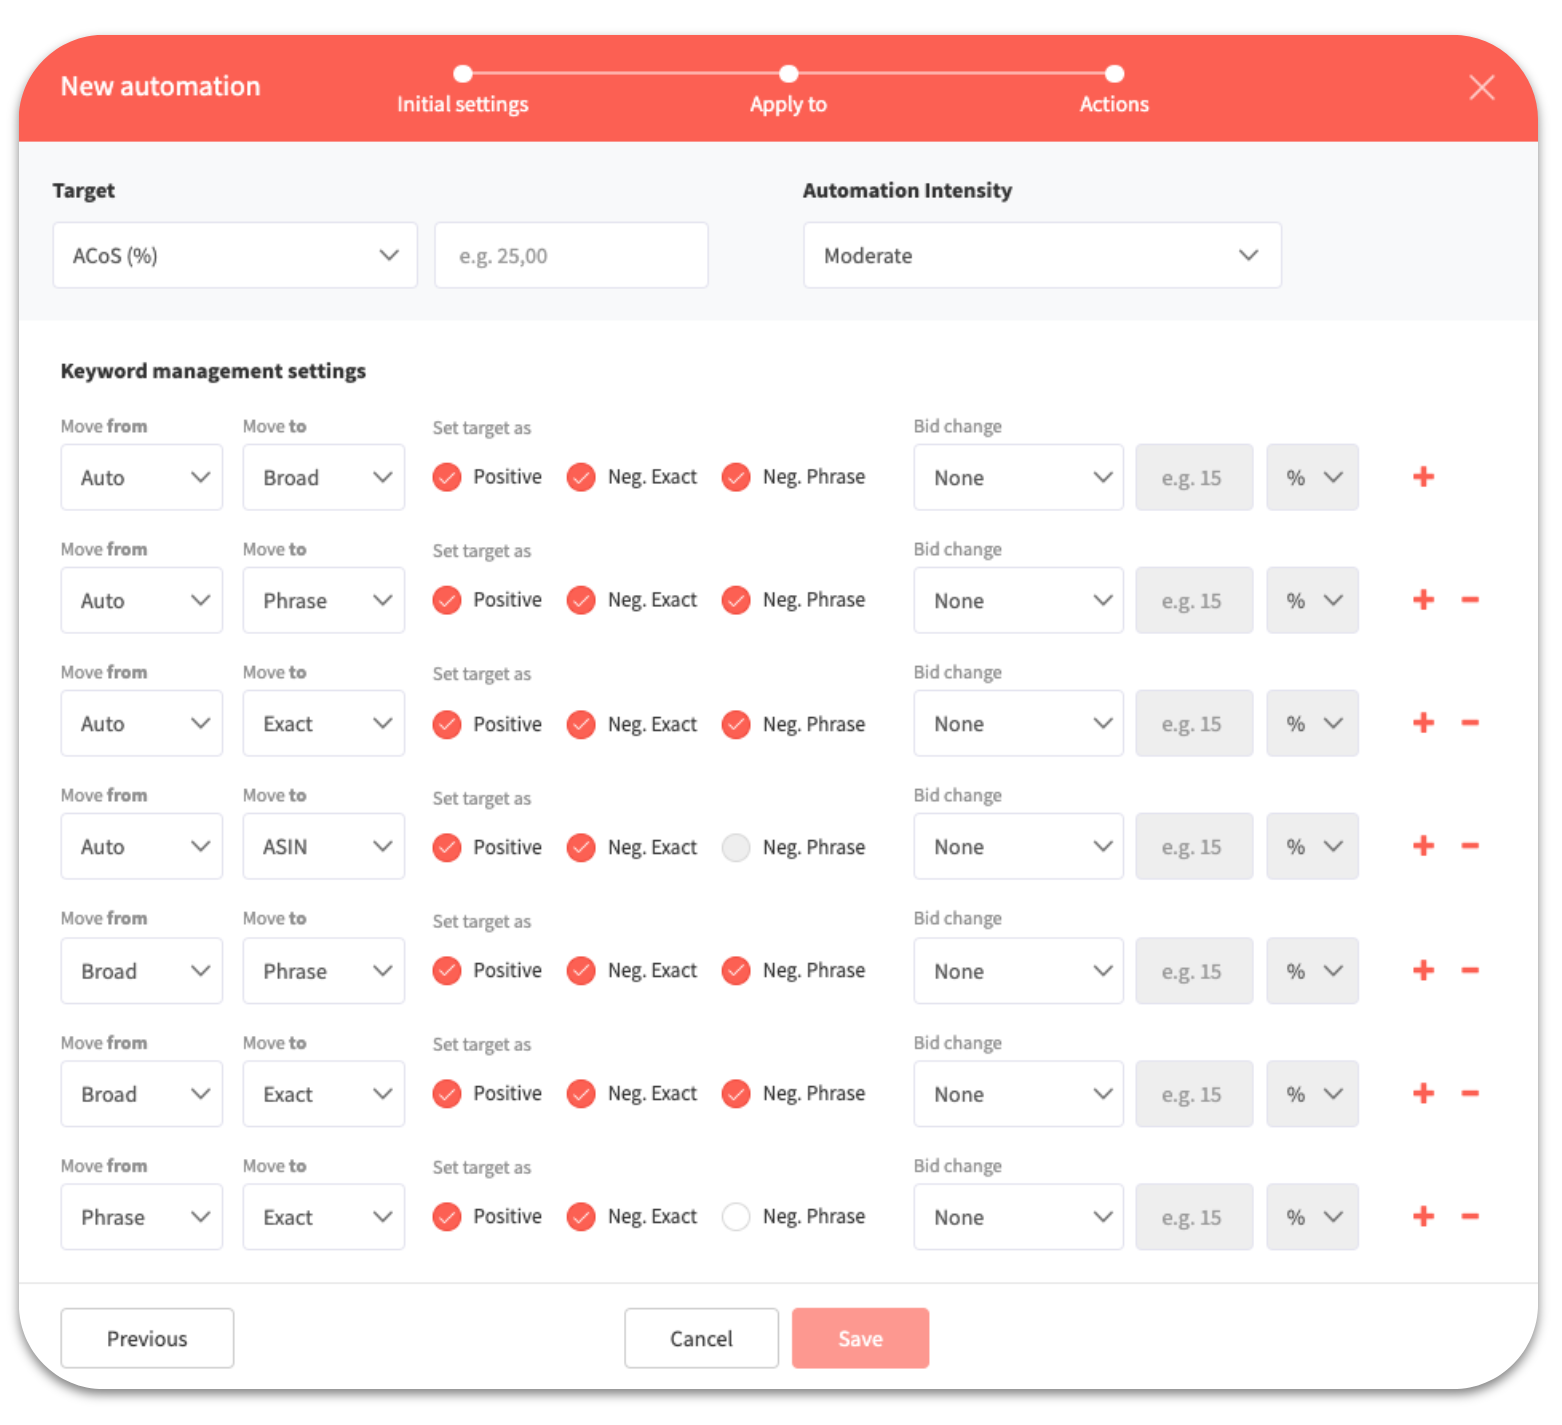
Note: The shown default settings are our recommendations for the keyword management.
For example, the first row triggers the creation of a search term from the Auto campaign as a positive Broad in the Broad campaign. Additionally the corresponding negative Exact and negative Phrase keywords are created. The negative keywords will only be created in the source group on the left, meaning the Auto campaign in this case
Now complete the creation of the automation by clicking on "Save".
Note: Depending on the purpose selected in the Basic Settings, a part of the previous screenshot may be hidden.